How to use ADAS.v
(All mentioned pictures can be found at the bottom of the page)
Overview
Patients use ADAS.v on their own Android or iPhone devices to record daily walking, running or cycling activities for up to 60 minutes per Activity Session. Clinical symptoms development will be collected weekly by BRAFs and FLARE questionnaires. Fetched data would be stored on a Remote Server and linked to an anonymous ID auto assigned to the patient followed by the first data upload. This anonymous ID cannot be linked to any particular person until the ADAS.v user has disclosed that he is an ID holder.
ADAS.v does not collect any private user information or permanently store data on user phones.
Patients see an easy to understand summary of collected data on their phones and may share it with their physicians.
ADAS.v may be used for:
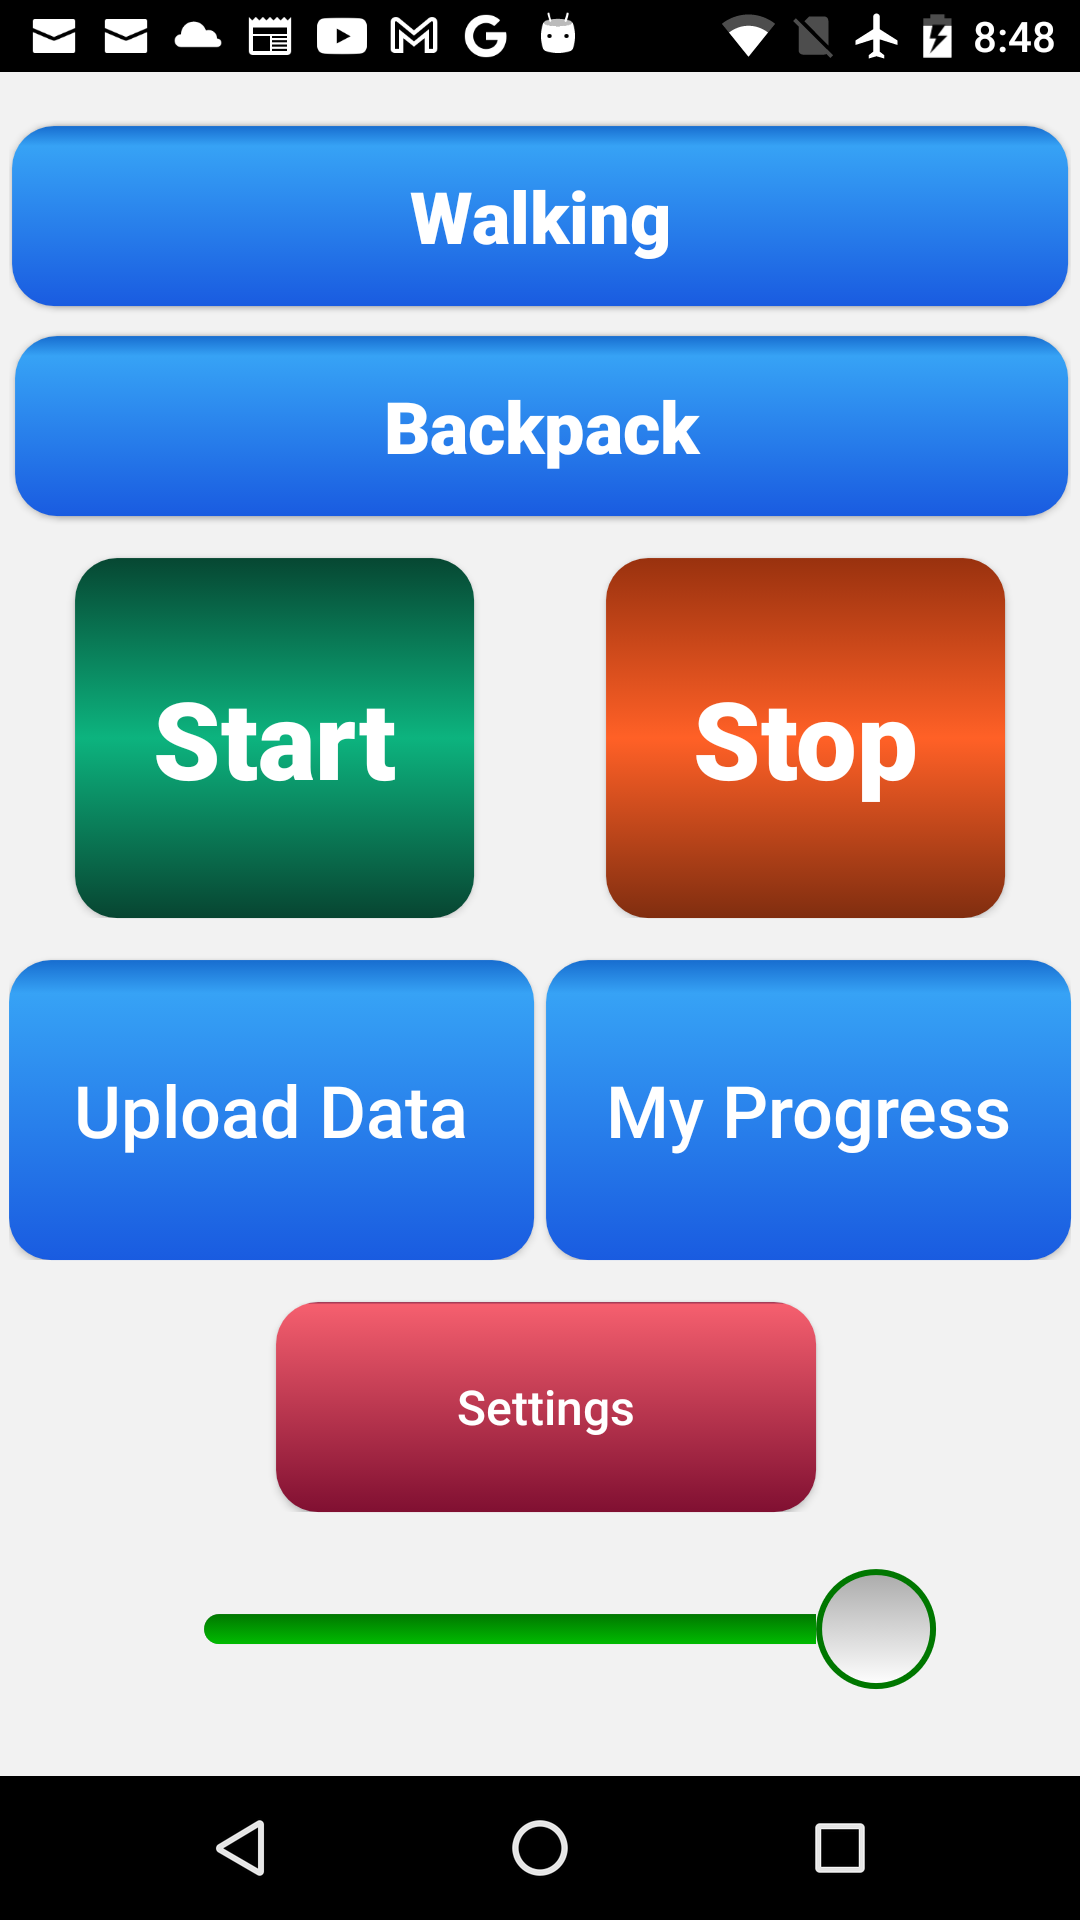
- Recording the Activity Sessions and Clinical Symptoms. (The Start, Stop buttons, pic Main_ADAS)
- Upload collected data to the Remote Data Centre for Processing. (The Upload button, pic Main_ADAS)
- Download the simplified summary of processing results. (“My Progress” button, pic Main_ADAS.png)
Before you start
At the first usage:
- Select the Activity and Phone Location by using the corresponding top buttons.
- Click the Settings button. On the next screen, select the Session Duration as 15, 20, 30 or 60 min.
Note: Do not change those values for the next 90 days to make collected data comparable.
Start session:
- Switch phone to airplane mode.
Note: This is preferable, because incoming call erases the Recording Session.
- Click the Start button, read and understand the pop-up dialog and touch the “OK” button.
Note: The bottom Slider would be moved to far left; The Phone screen may become dimmer right away or a bit later. That would mean that Activity Recording has started. .
- Apply screen soft protector
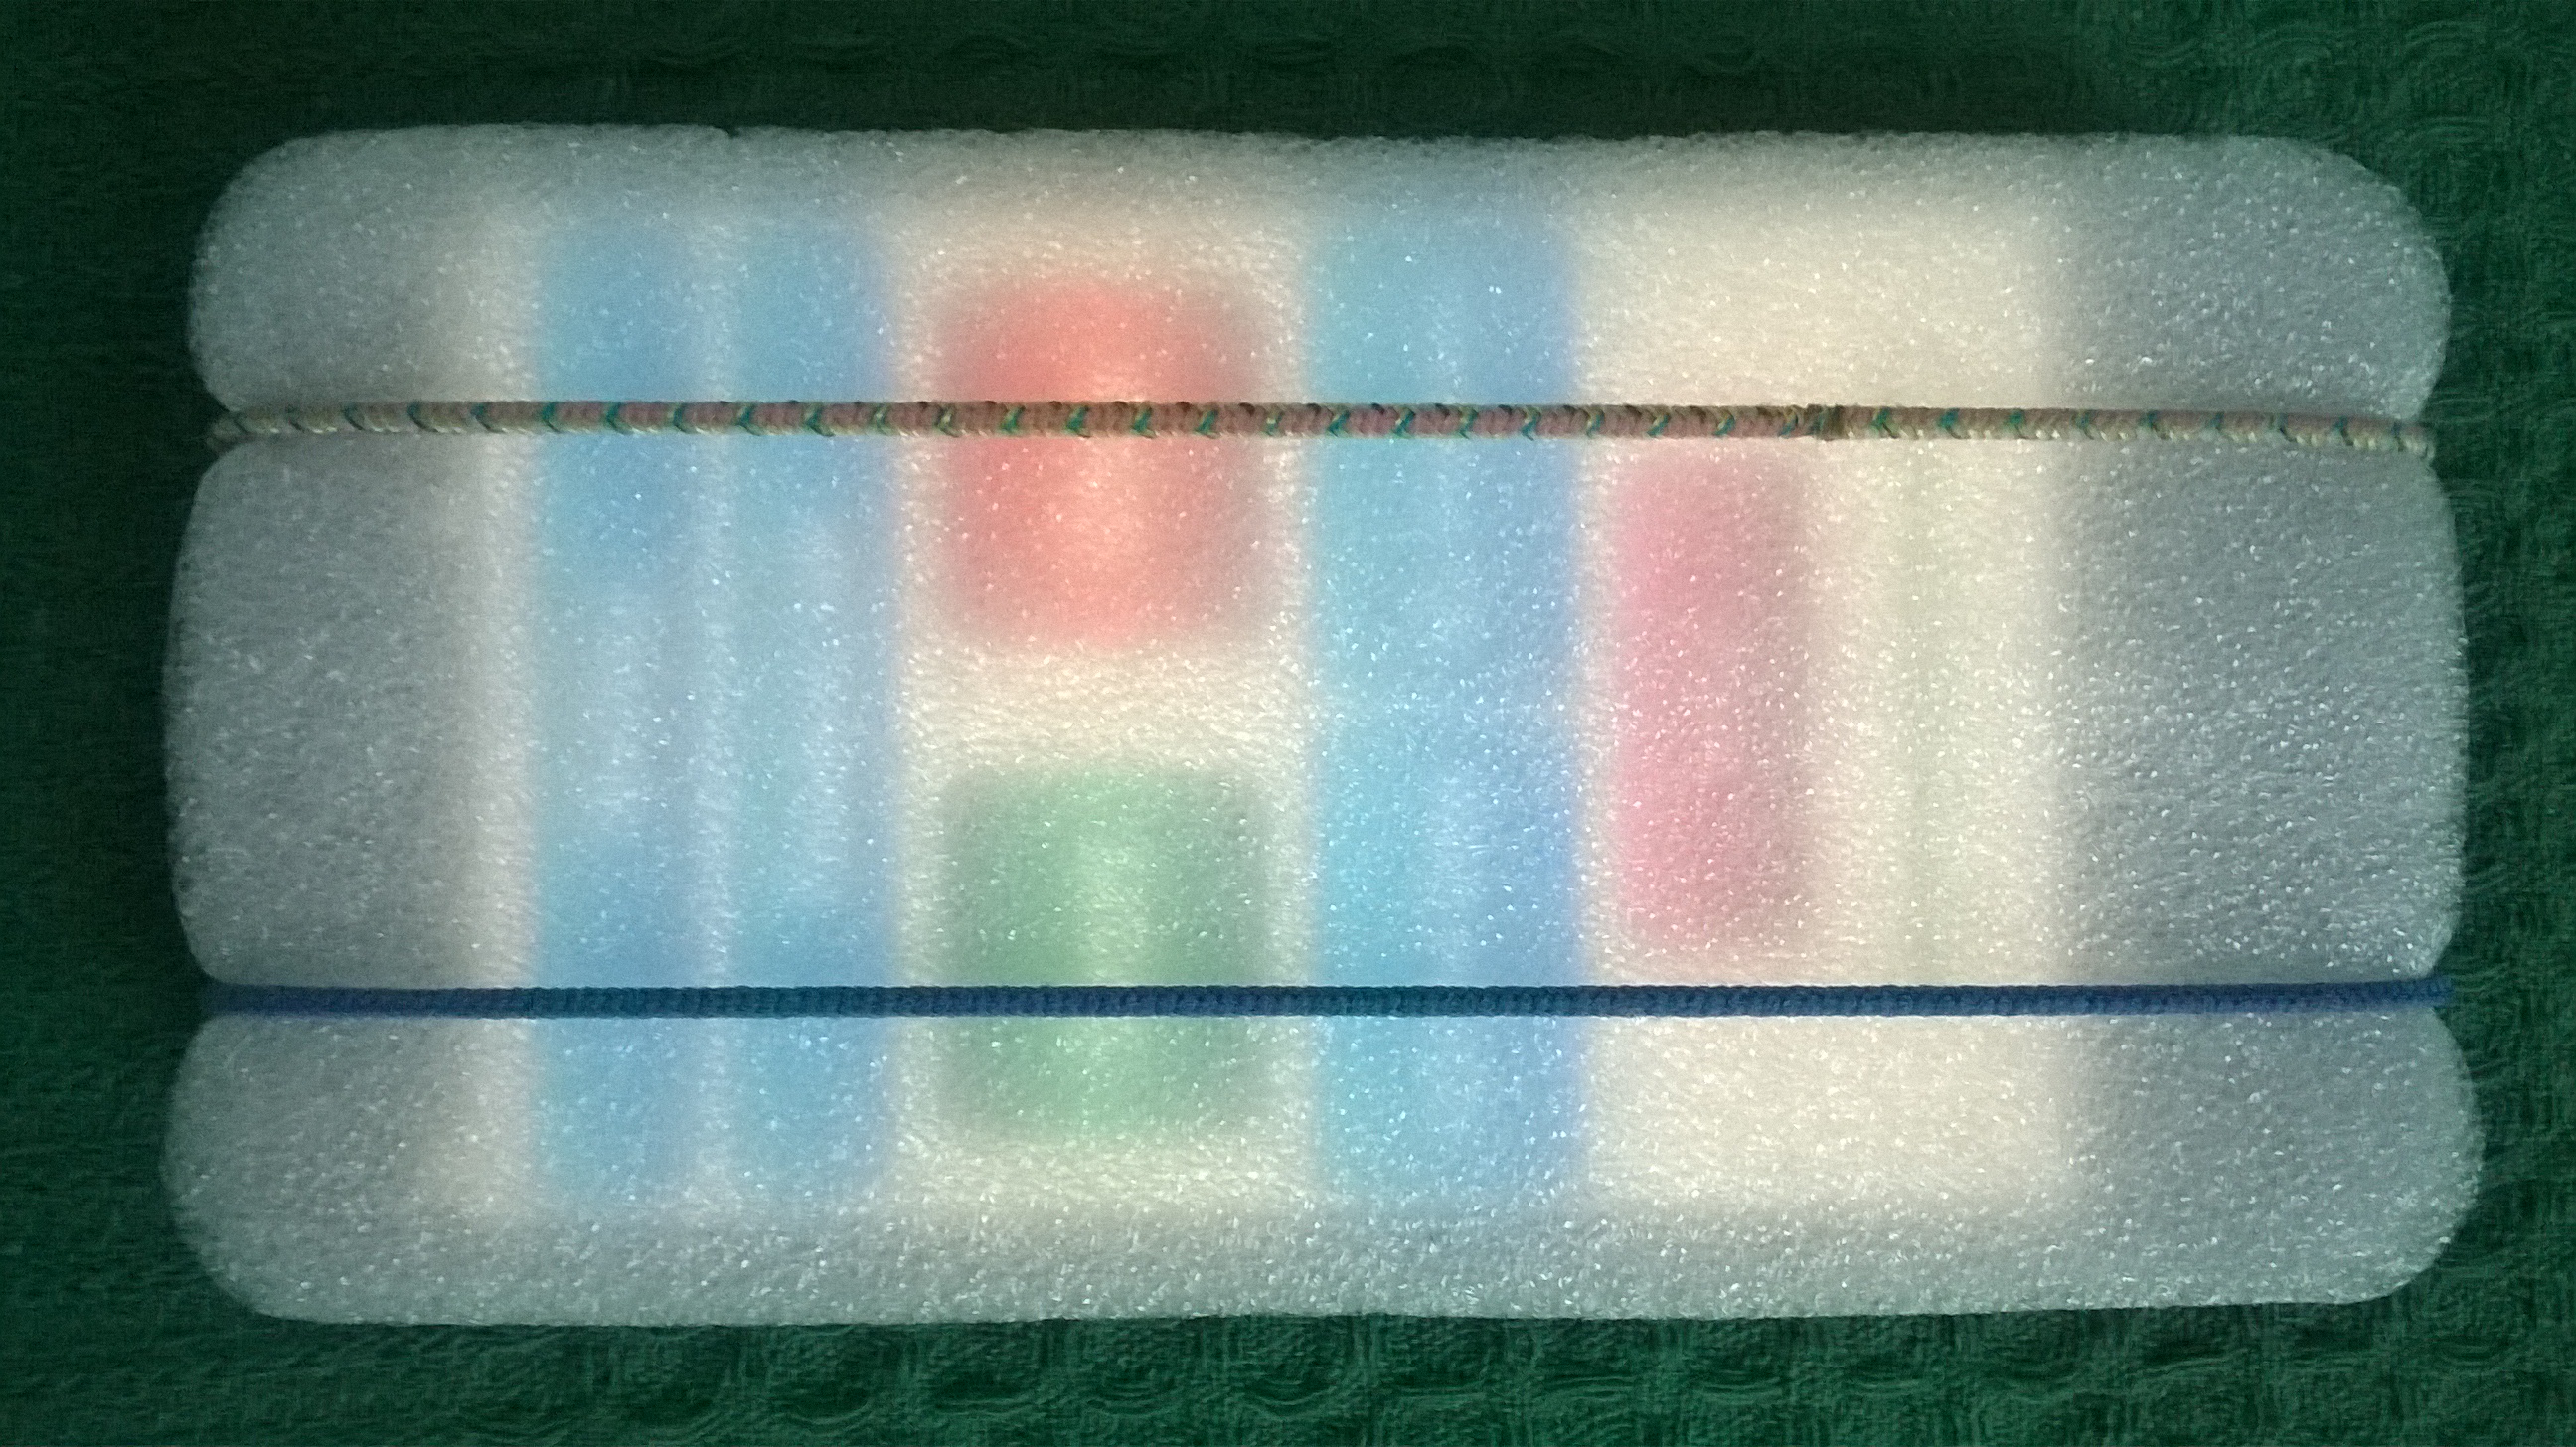
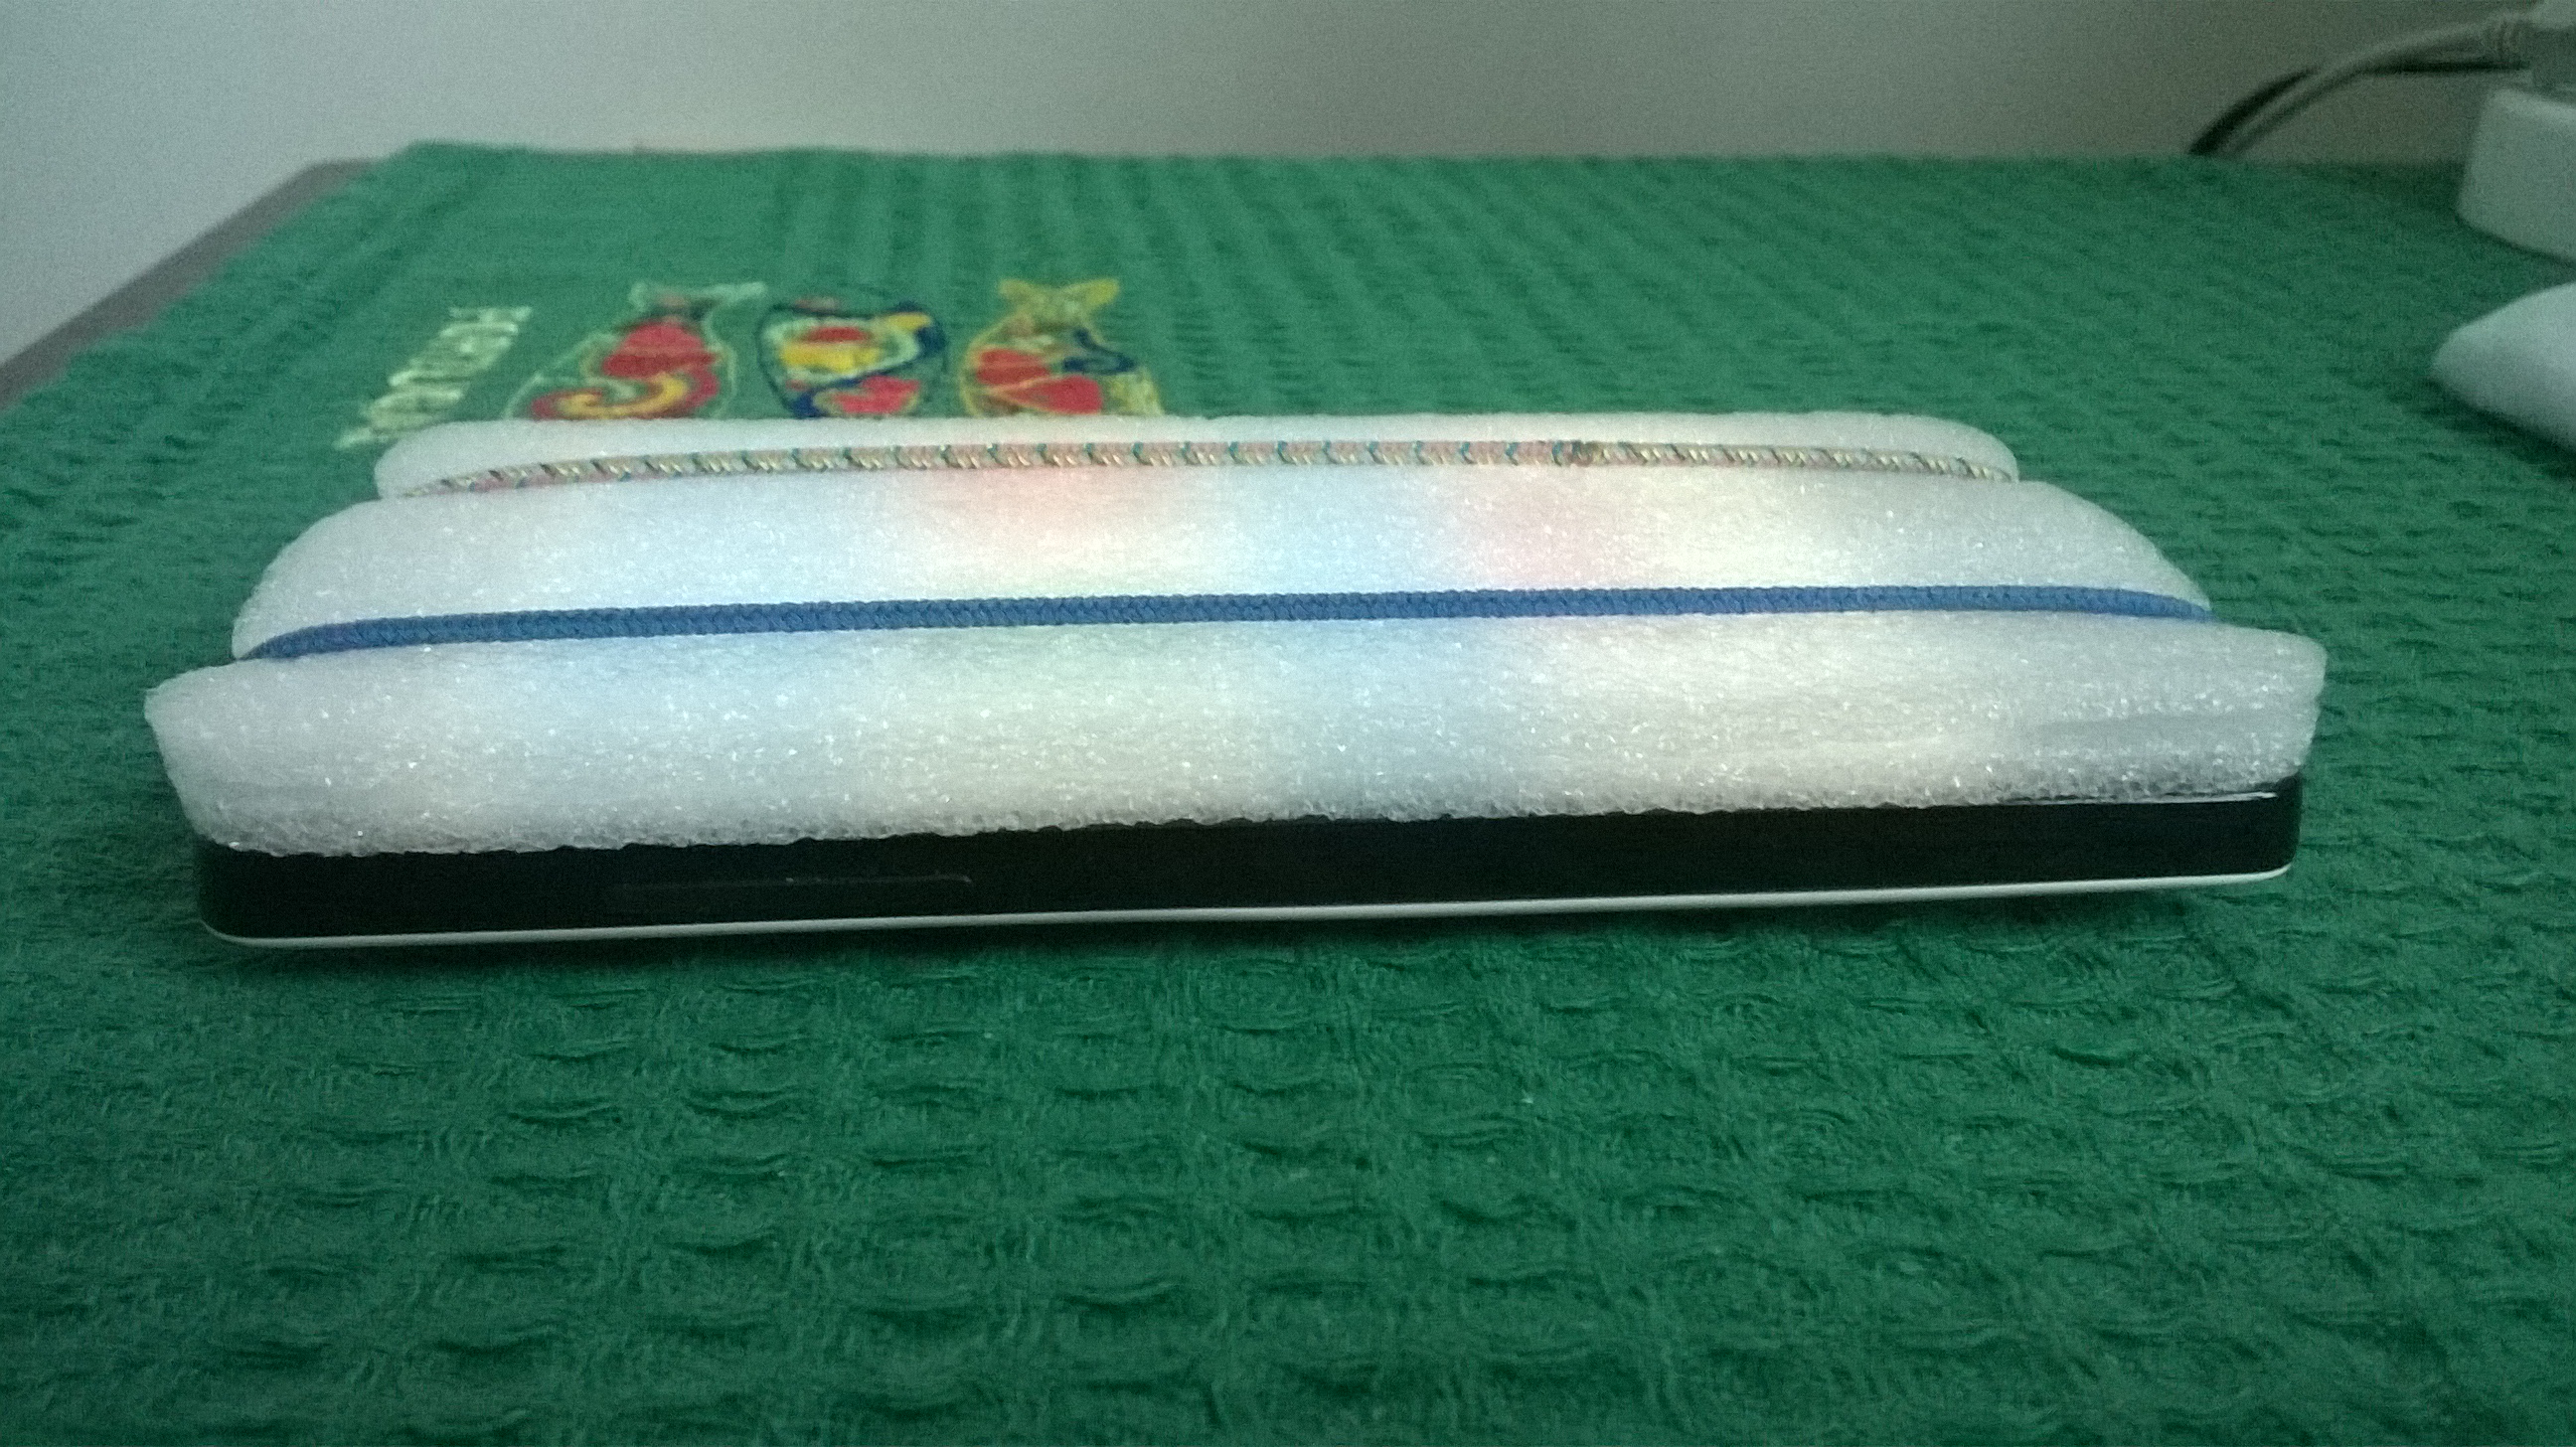
Note: Always, protect the phone screen with at least a 5 mm thick soft foam cover secured by 2 rubber bands as shown on pic.Foam_1, Foam_2
- Do not touch the Side (ON / OFF) button. Keep the phone running.
Note: The phone screen MUST be lit up during a complete ADAS.v recording session
- Place the phone in the chosen location on your body (pocket, tethered pouch or so).
- Follow the chosen Activity for selected session duration.
Stop session:
- Take the phone from your pocket, pouch or so.
- Remove the foam cover.
- Move the bottom Slider to the far right.
Note: That will restore your usual phone screen brightness.
- Click the Stop button to actually finish the Recording.
Interview:
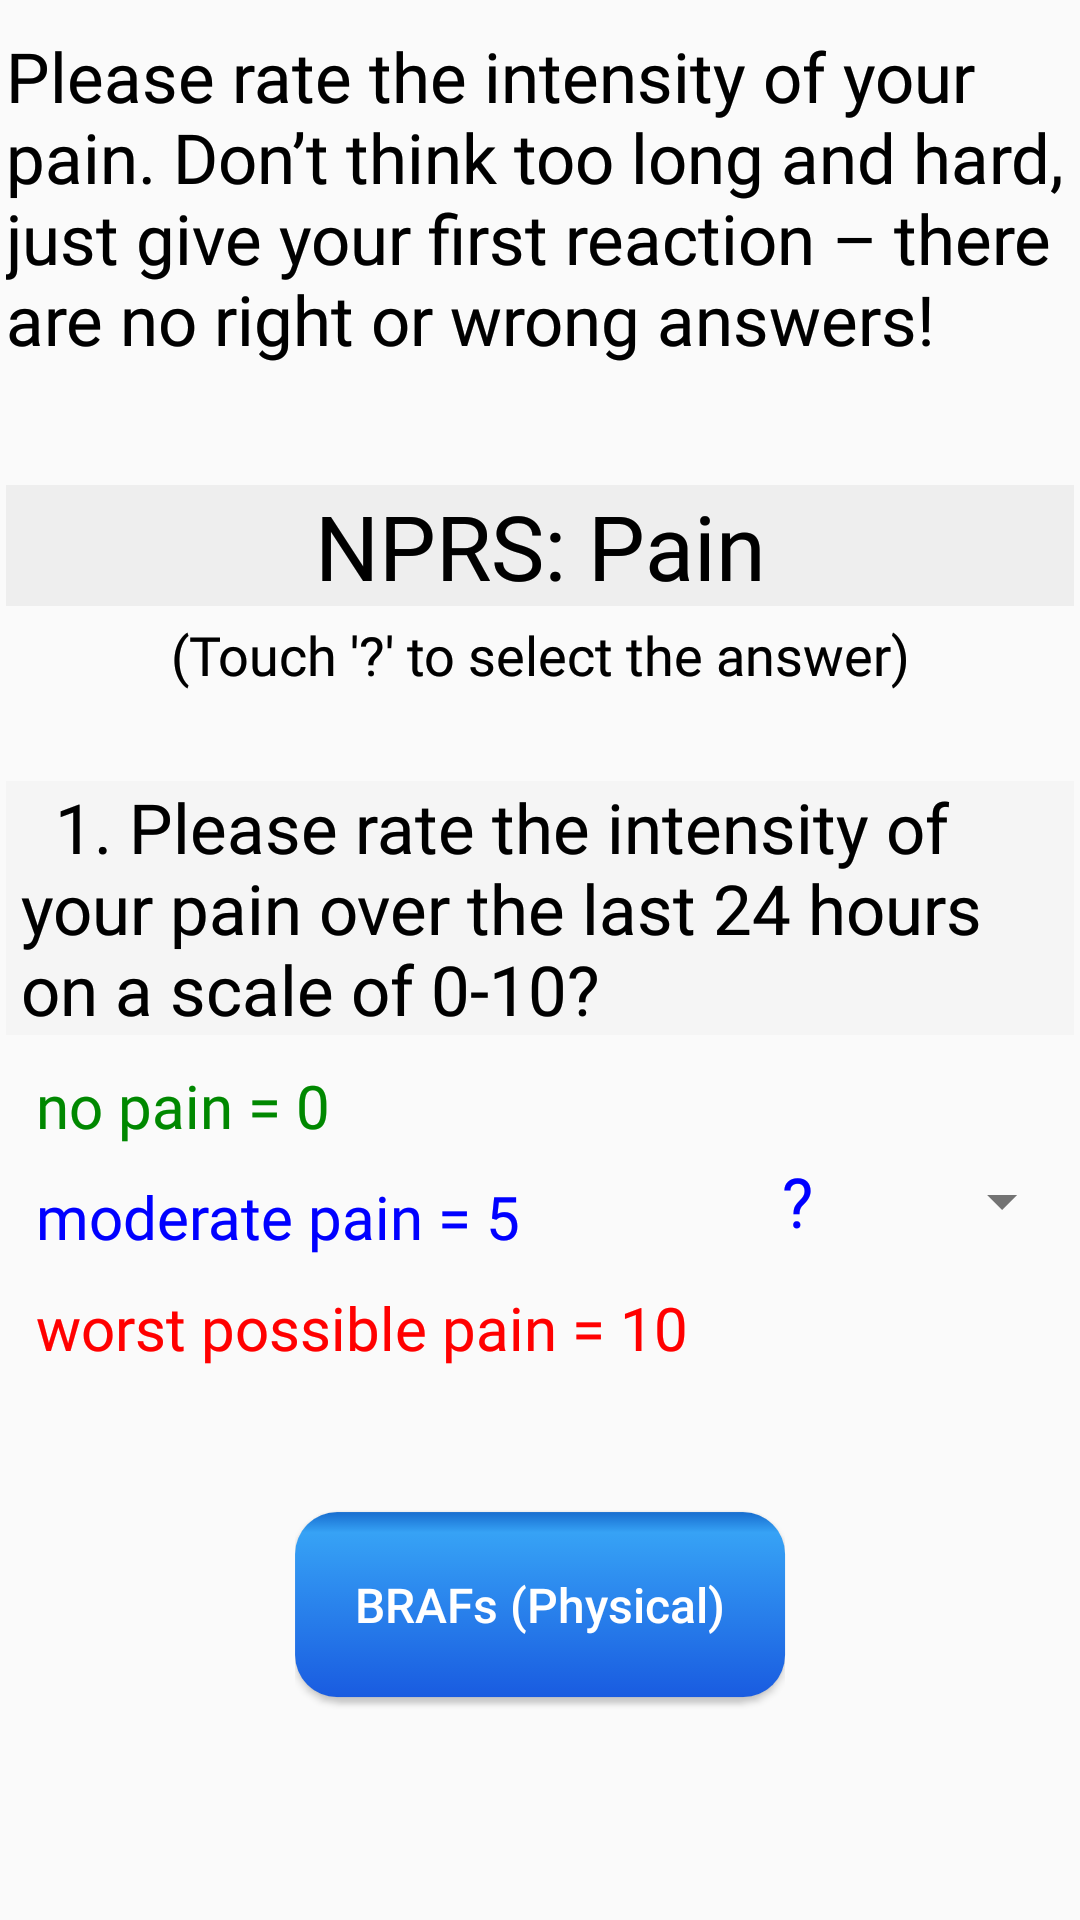
After each recorded session you will be asked to rate your Pain level.
Once per 7 days you should also respond to BRAFs and FLARE questionnaires. If the BRAFs & FLARE questionnaire screens are presented and stays, then it is time for the interview.
- Rate your Pain level as 0 to 10 (pic NPRS)
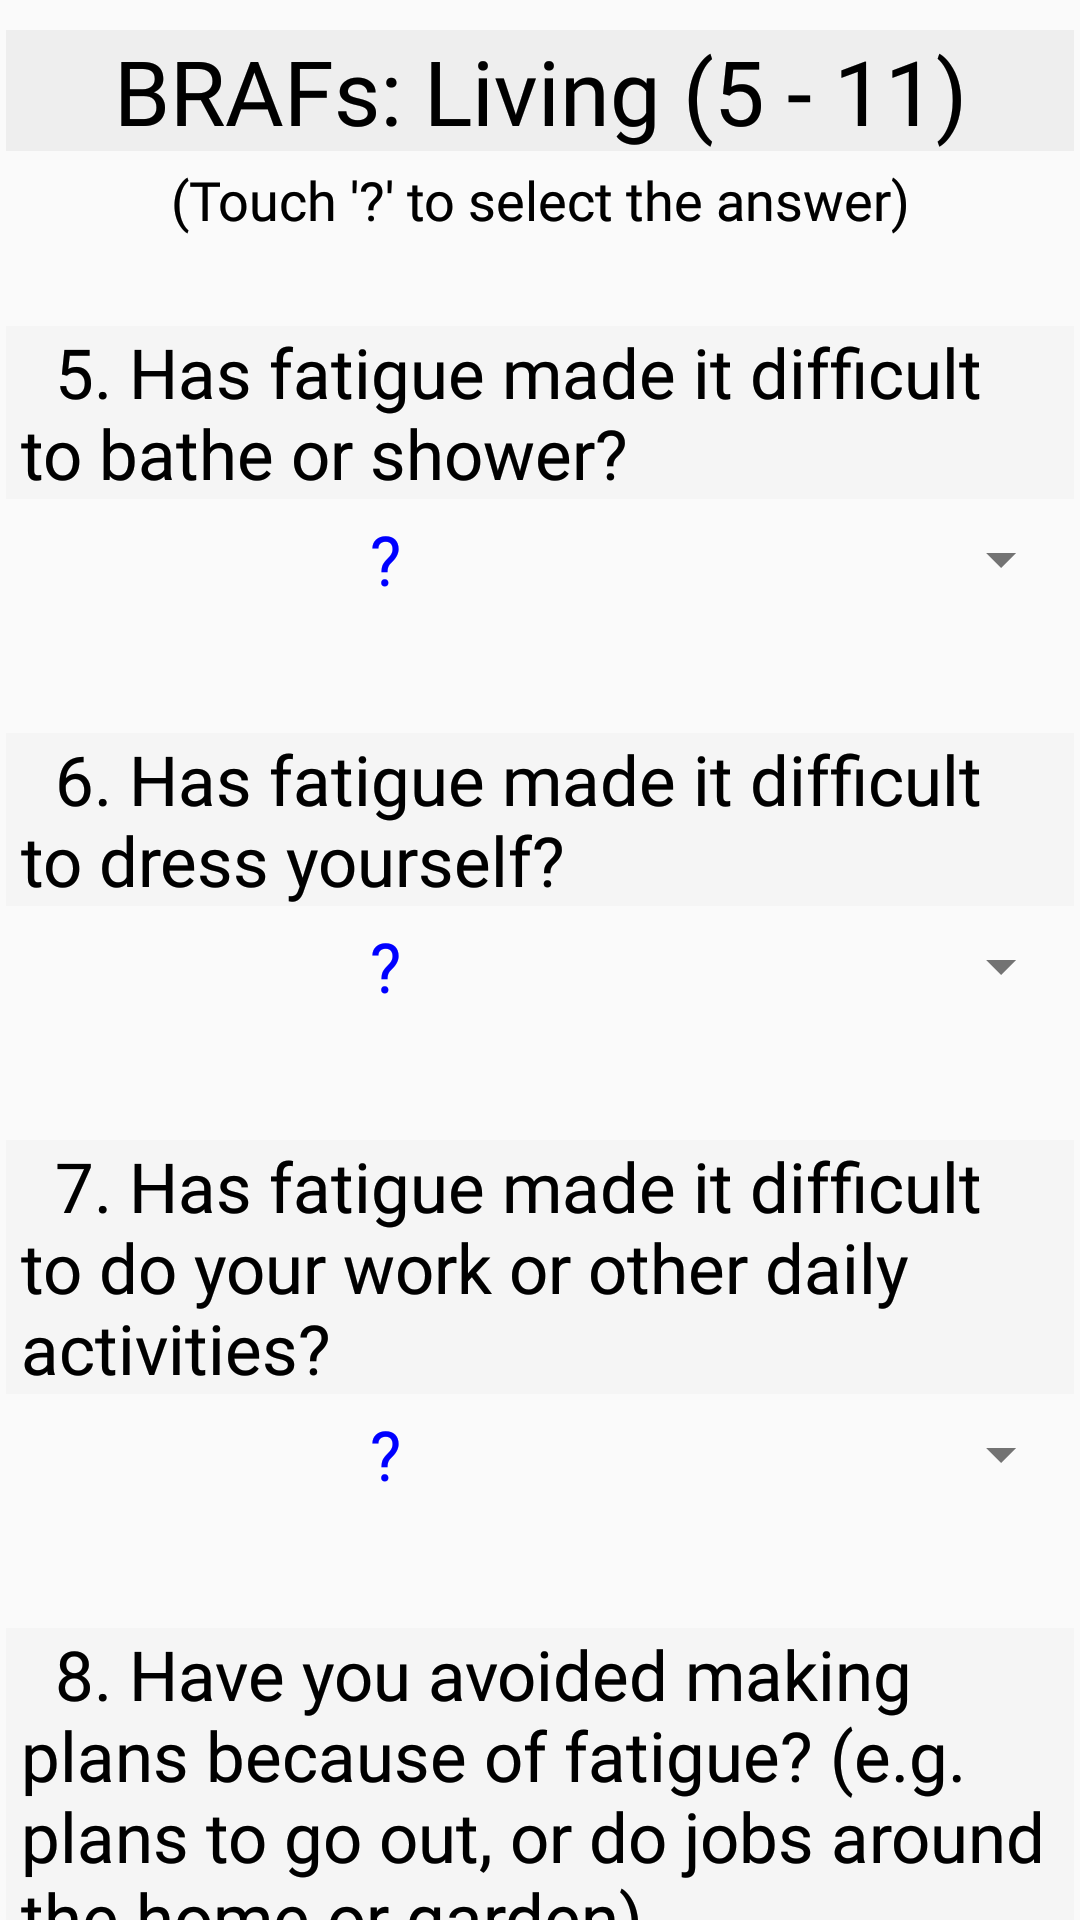
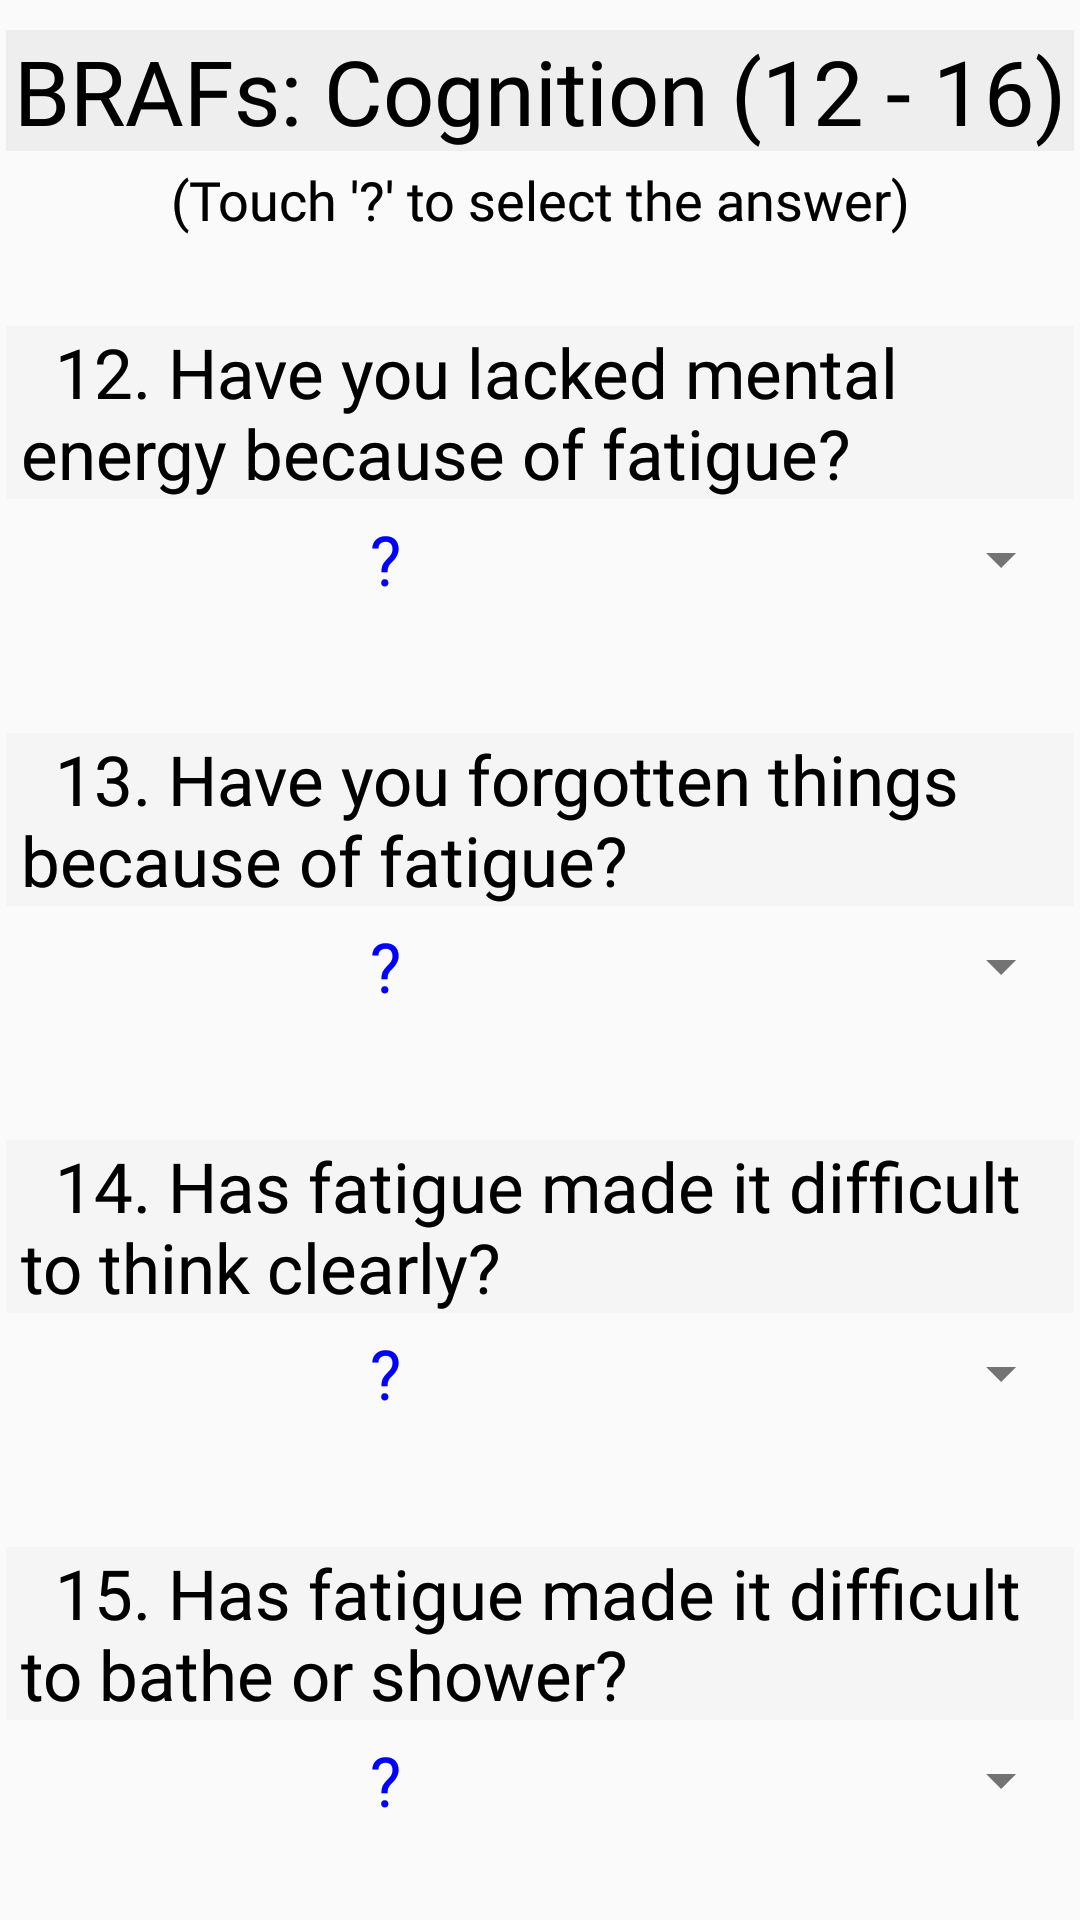
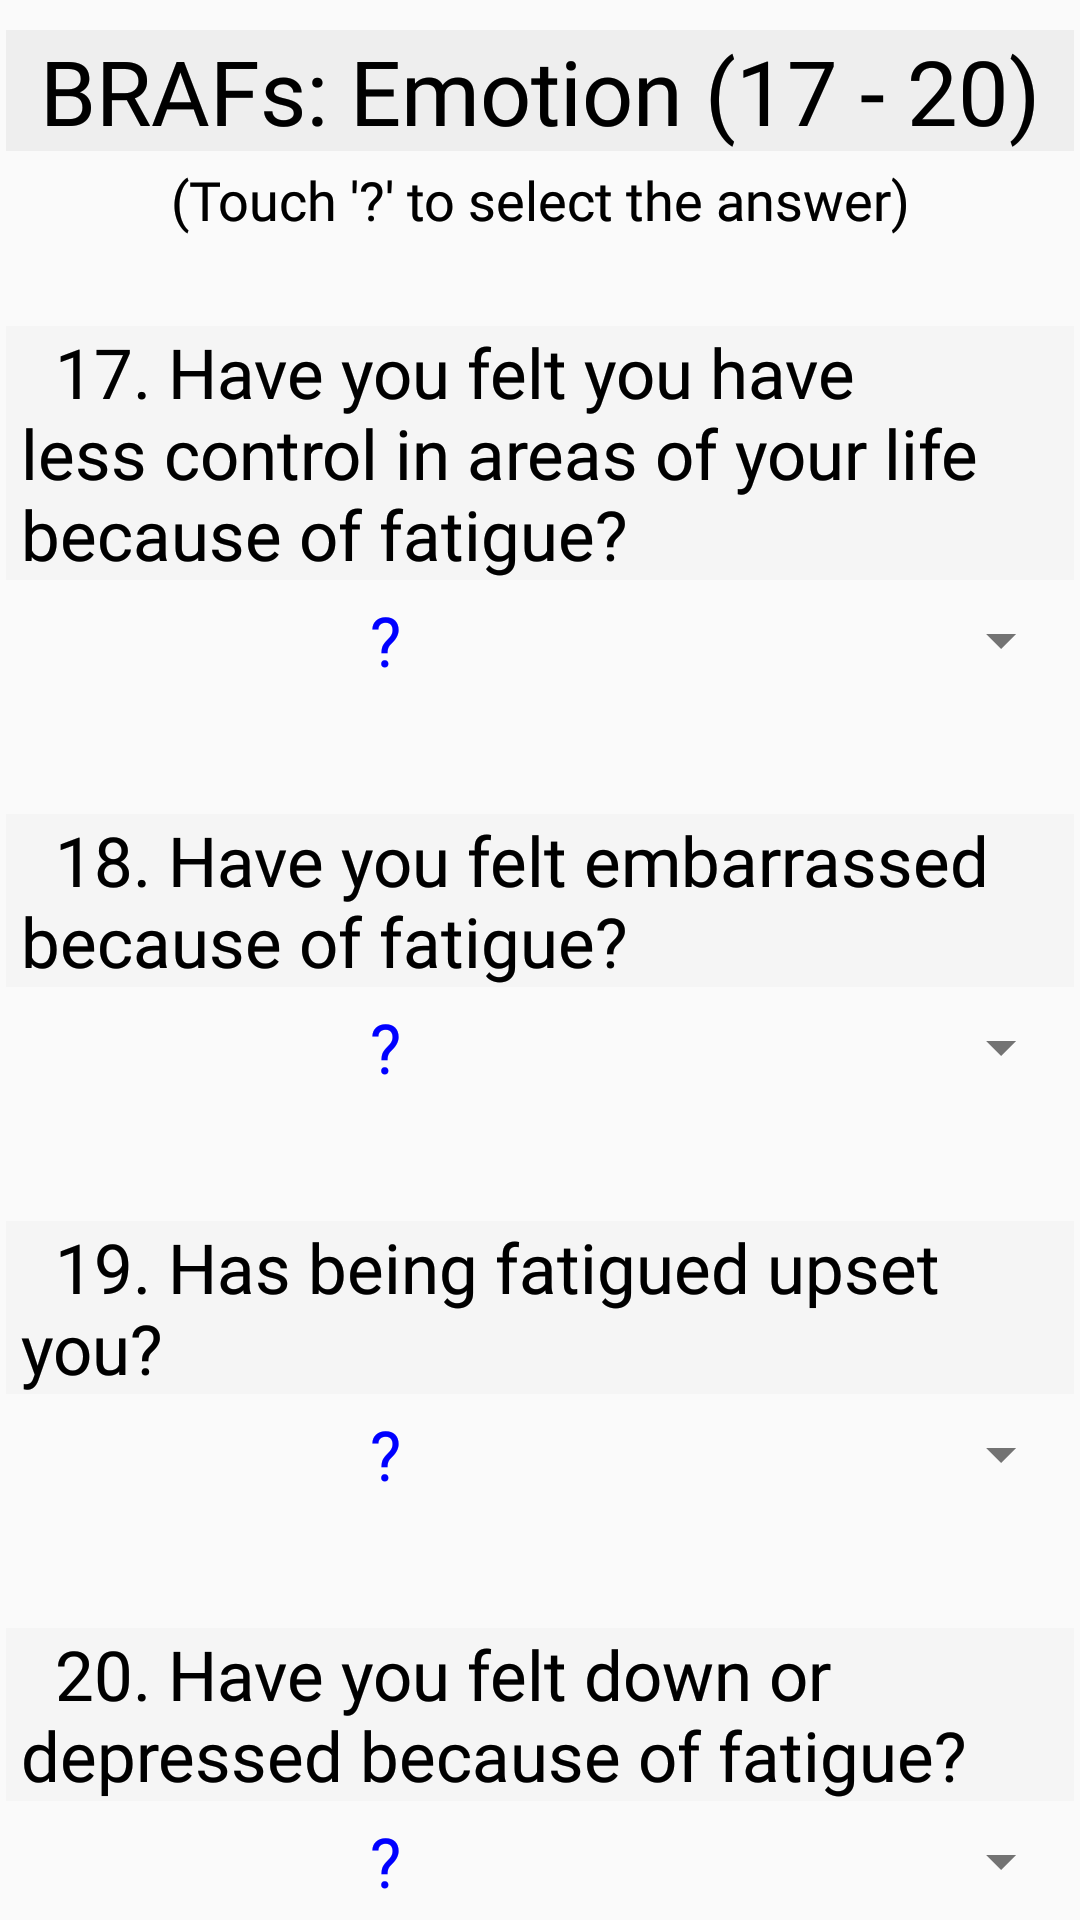
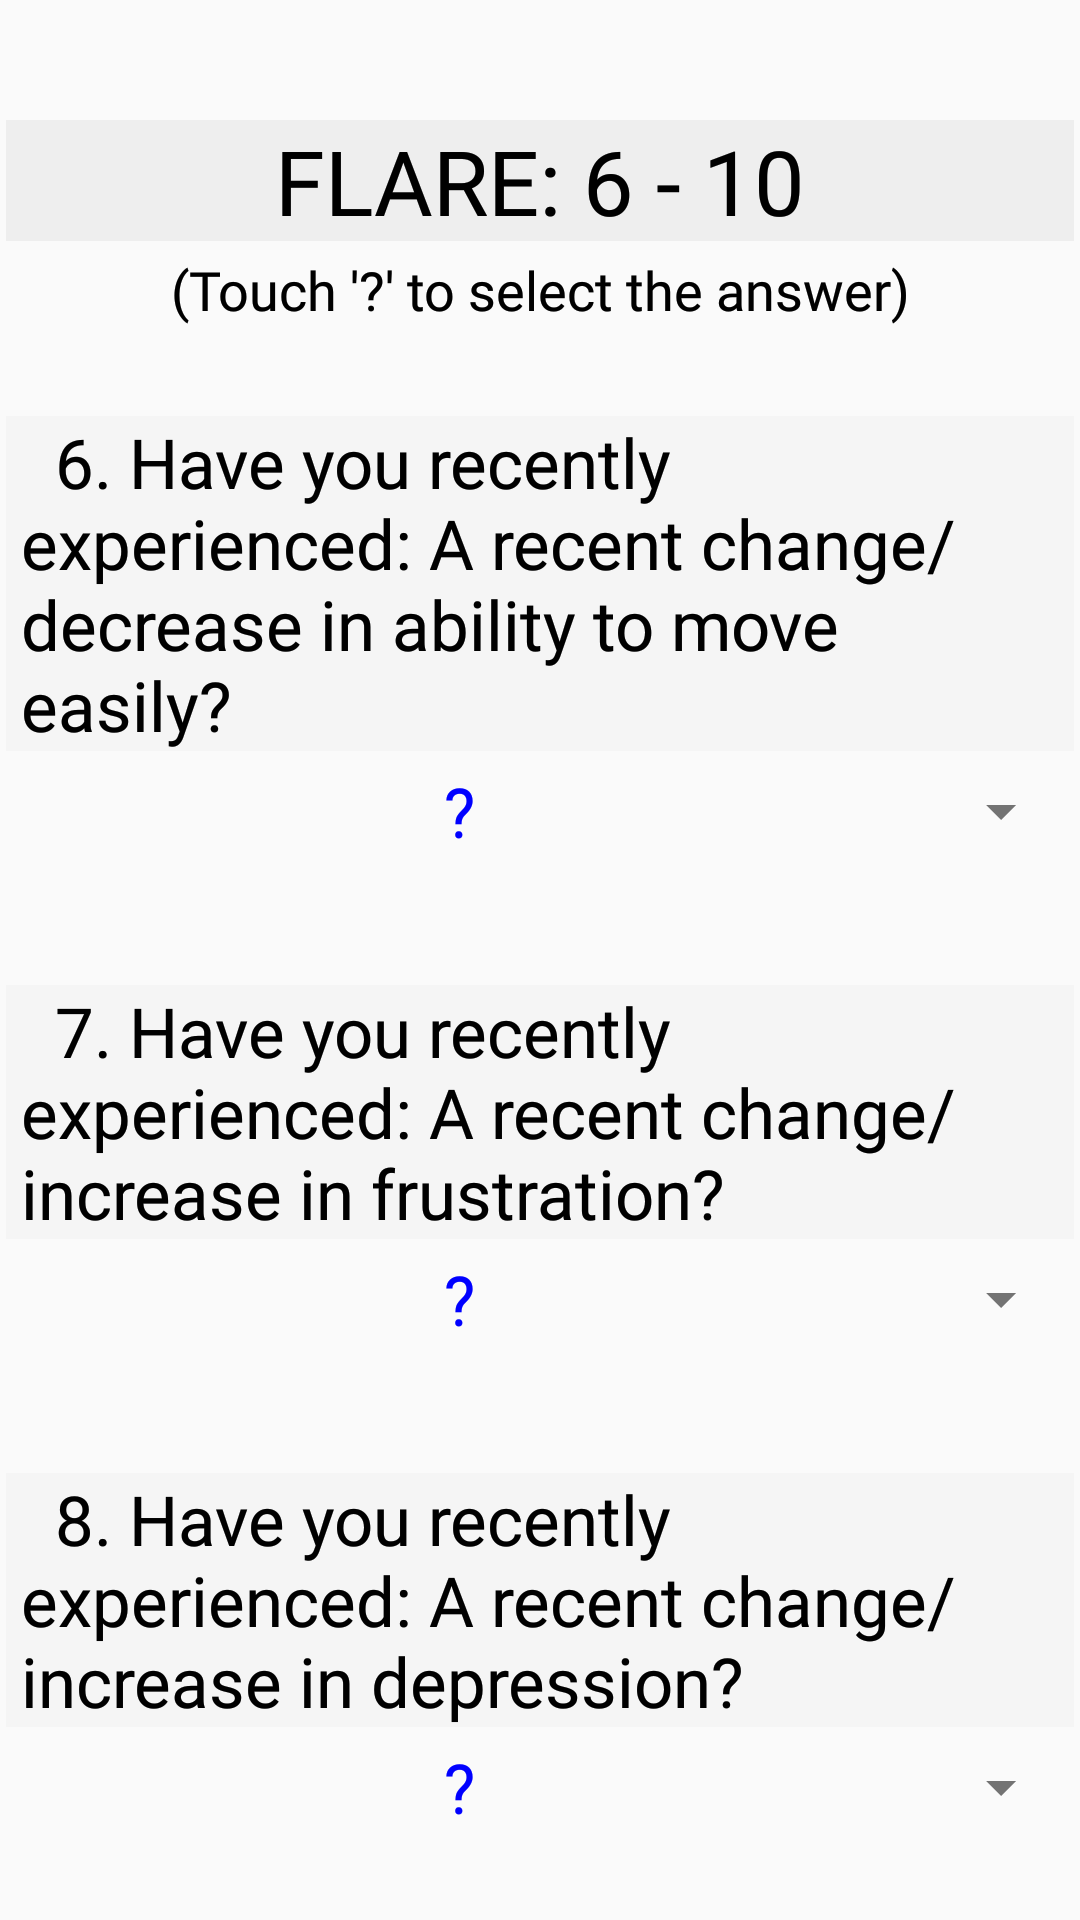
- Answer the questions. There will be 6 consecutive screens with BRAFs questions (pic BRAFs_1 – BRAFs_4) and FLARE questions (pic FLARE_1, FLARE_2)
- Use the Next button to move to the upcoming screen.
- Use the Done button on the last screen.
Now, you are done. You had recorded the complete session.
- Please remember to Switch OFF the phone Airplane mode.
- You may work with other phone apps or switch the phone screen OFF.
- Please be advised that sessions, which are less than 20% of chosen session duration, may be auto discarded by remote server as too short to process.
Upload:
The data you had collected with ADAS.v should be transferred to the remote Data Centre for processing.
You can do this right after you finish the session or you can collect several sessions and upload them at once.
- Click the Upload button to transfer finished sessions to the remote Data Centre.
- Wait for the Success message.
Note: For Upload to function, the phone should be connected to Wi-Fi or has a valid Cell Data plan. If both are available, then Wi-Fi will be used.
My Progress:
After the recorded Activity session was uploaded to the remote Data Centre, it would be processed.
A short summary of processed data may be seen on the My Progress screen.
At any time, when you are not running: a Session Recording or using Upload:
- You can bring ADAS.v on phone screen
- Click the "My Progress" button and see the timely parameters of your Activities and Interview scores.
Note: The My Progress screen will work after the first 2 uploaded sessions. My Progress requires
Wi-Fi or a valid Cell Data plan to function.
Understanding "My Progress":
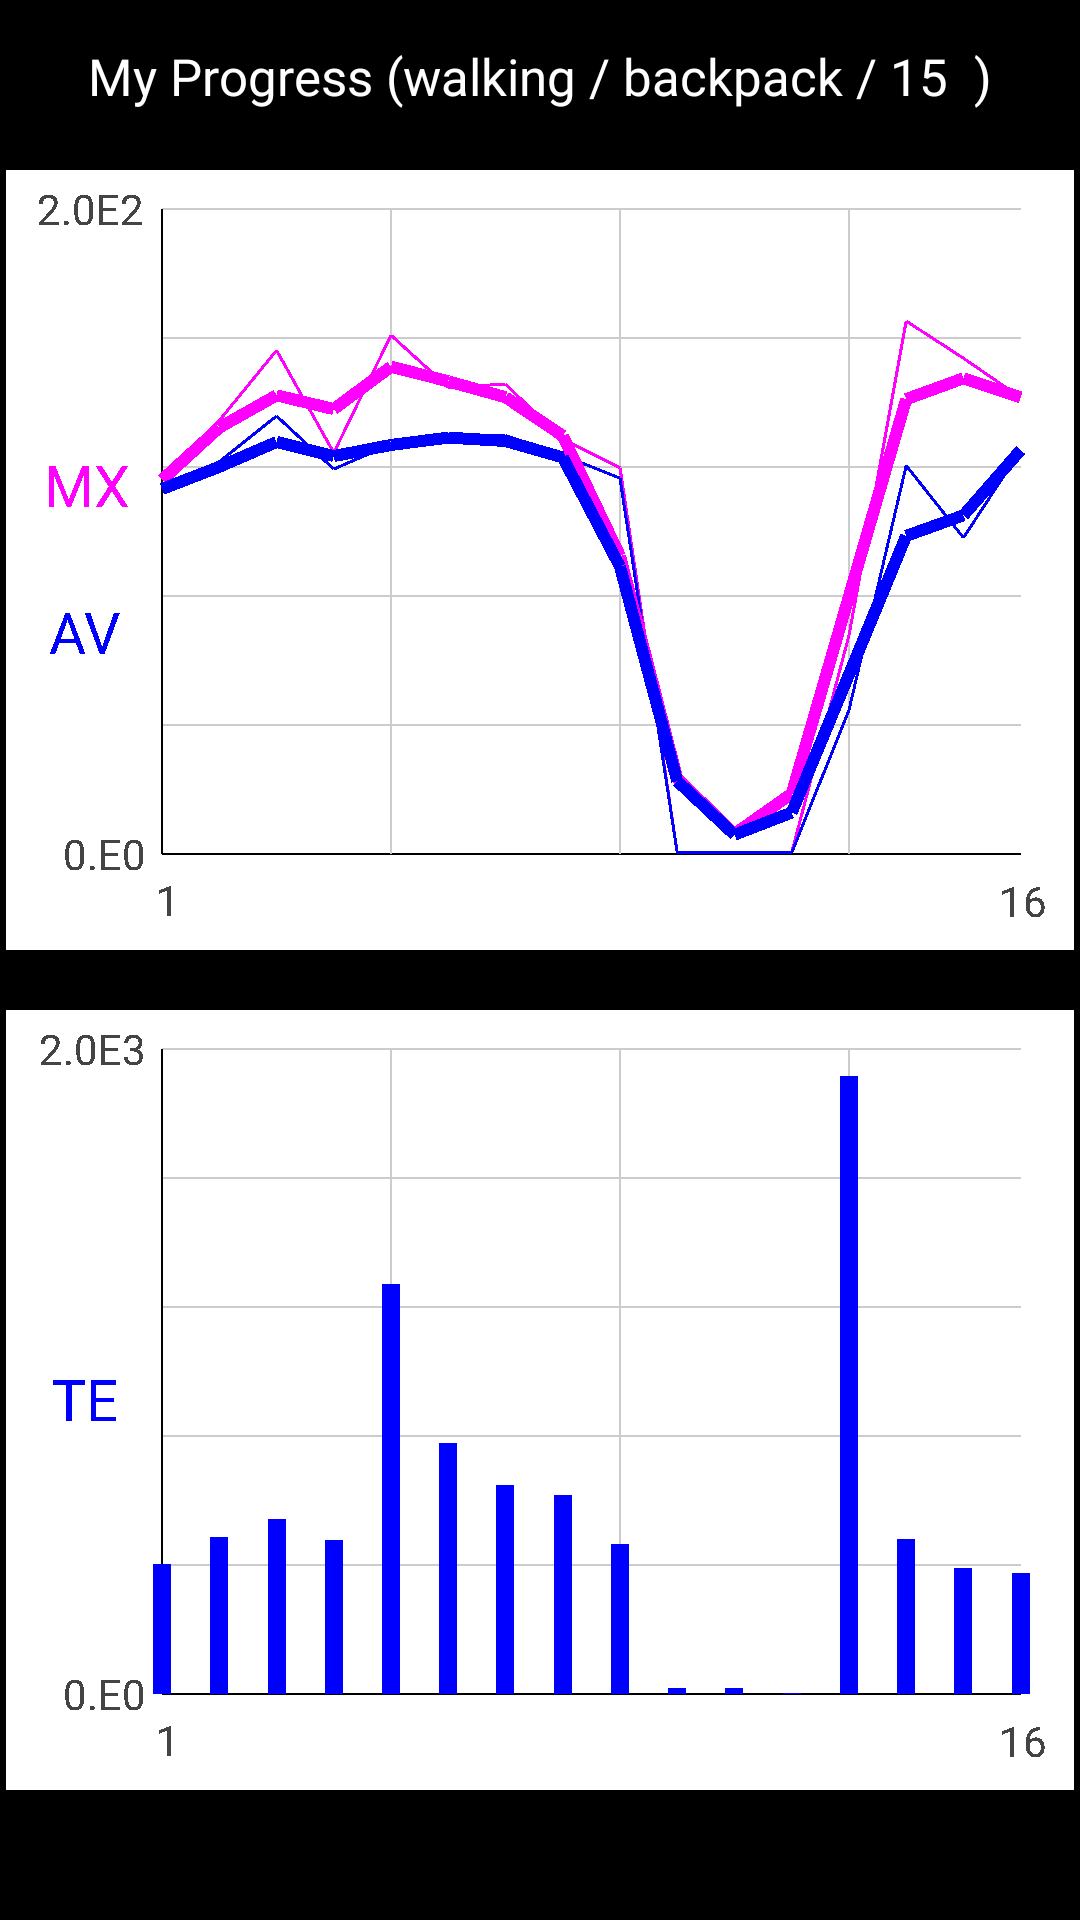
Measured activity is quantized into E-units (E) which are the 'Efforts' per a defined time slot.
- Upper chart: Width Red line indicates the maximum E noticed at the particular session; Blue - the averaged E per the same session (pic My_Progress_1). Ignore the thin lines.
- Next chart is the Total E units spent per session.
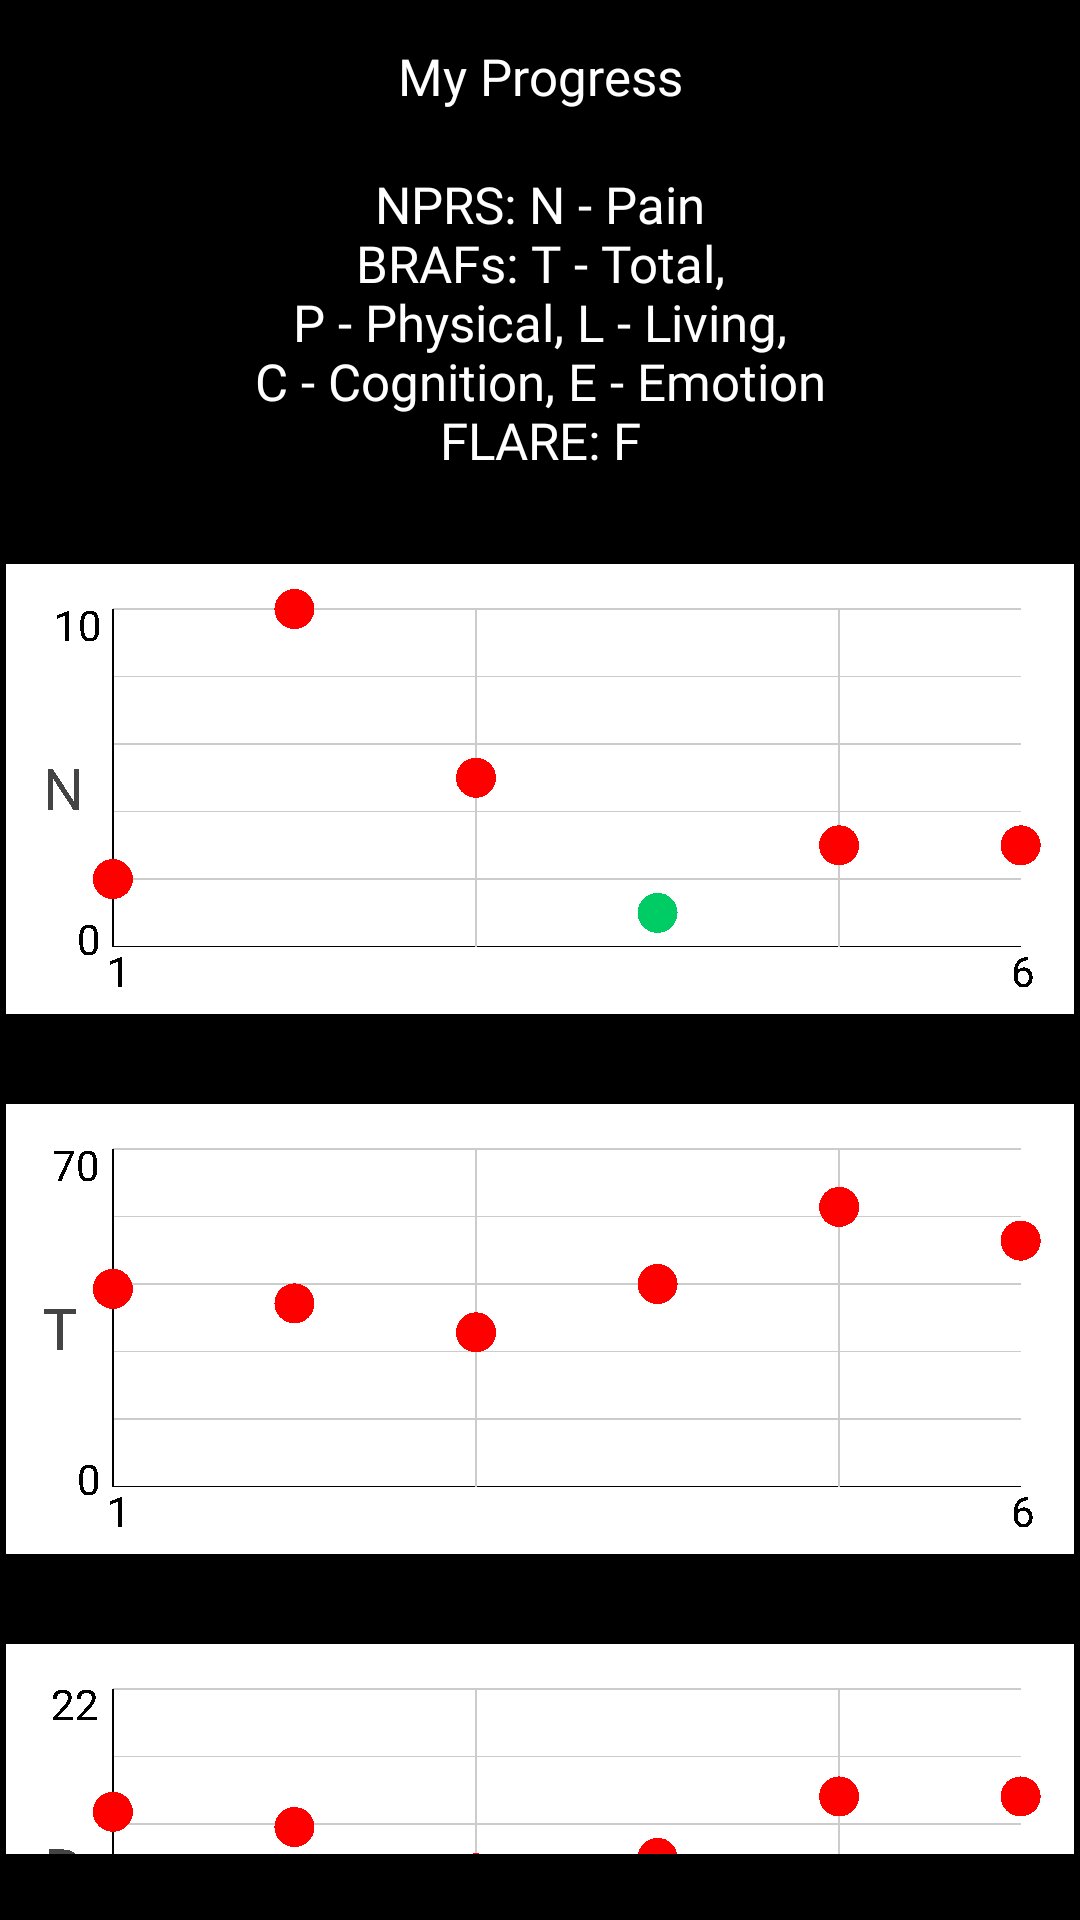
- Next chart displays the Pain level. The lower values mean that you are getting better.
- Next chart displays the Total BRAFs Score as a summary of Scores in the all 4 groups (Physical, Living, Cognitive & Emotion) as well as FLARE score. The lower values mean the less severe symptoms (pic My_Progress_2).
- Next chart is your Score in the Physical group. The lower values mean the less severe symptoms.
- Next chart is your Score in the Living group. The lower values mean the less severe symptoms.
- Next chart is your Score in the Cognitive group. The lower values mean the less severe symptoms.
- Next chart is your Score in the Emotion group. The lower values mean the less severe symptoms.
- Next chart is your FLARE Score. The lower values mean the less severe symptoms.
Note: Horizontal axis is a consecutive session number.
Footnote:
Your anonymized User ID would be assigned following the first Interview Upload.
- Click the Setting button. Look for the User ID on the Settings screen (pic Settings). You should not share your User ID but with your physician only.
Warring: If you chose to uninstall the ADAS.v from your phone, then your User ID would be permanently lost.
If you decide to install ADAS.v once again, then another USER ID will be assigned. For security reasons, there is no way to reconnect your phone to already collected data.
ADAS team.
Note: ADAS team keeps a right to limit / delete the patient collected data or block some particular IDs from data upload.
(Last updated February 28, 2022)
pic Foam_1 |
pic Foam_2 |
pic Main_ADAS |
pic NPRS (Pain) |

pic BRAFs_1 |
pic BRAFs_2 |
pic BRAFs_3 |
pic BRAFs_4 |

pic FLARE_1 |
pic FLARE_2 |
pic My_Progress_1 |
pic My_Progress_2 |

pic Settings |